 0
 0
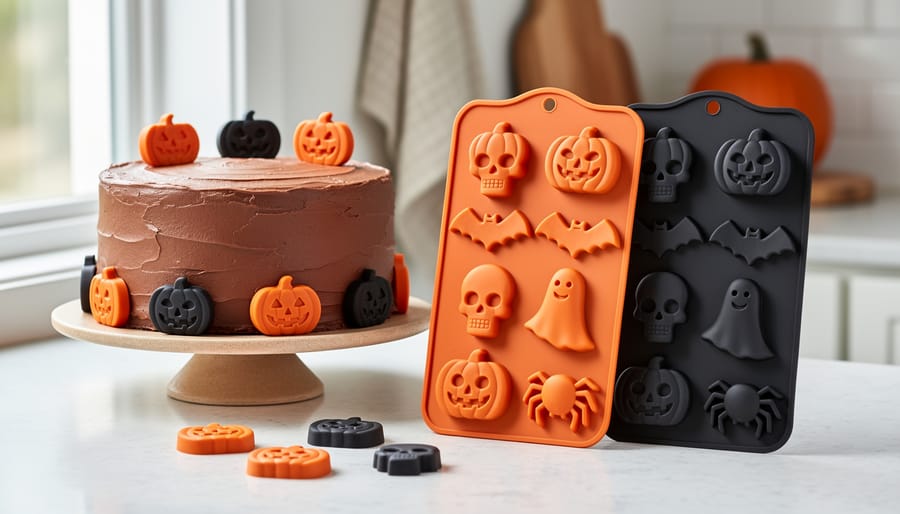
You can make Halloween cake decorations at home with a silicone mold, some fondant or chocolate, and about twenty minutes of hands-on time. No piping skills needed. Pick a mold shaped like pumpkins, skulls, bats, ghosts, or spiders, press your filling in, let it set, and pop out a perfect little topper that looks like it came from a bakery.
Silicone molds work so well because they’re flexible, reusable, and non-sticky, so the shapes release cleanly and keep their detail. They’re also forgiving with materials. Sugarpaste, petal paste, marzipan, and melted chocolate all work, which means you can use whatever’s already in your pantry. Small molds are budget-friendly too, with a number of Halloween skull and themed options priced around CAD $7.
If you’ve ever stared at a plain cake the night before a school party and felt your stomach drop, you’re in good company. Most of us have been there, and a handful of molded ghosts and bats can rescue the day. Below, you’ll find the tools you need, a few safety basics, and a simple step-by-step method so your decorations turn out spooky, sweet, and stress-free.
What You’ll Need for Easy Halloween Cake Decorations
Choosing a Mold That Fits Your Cake and Your Skill Level
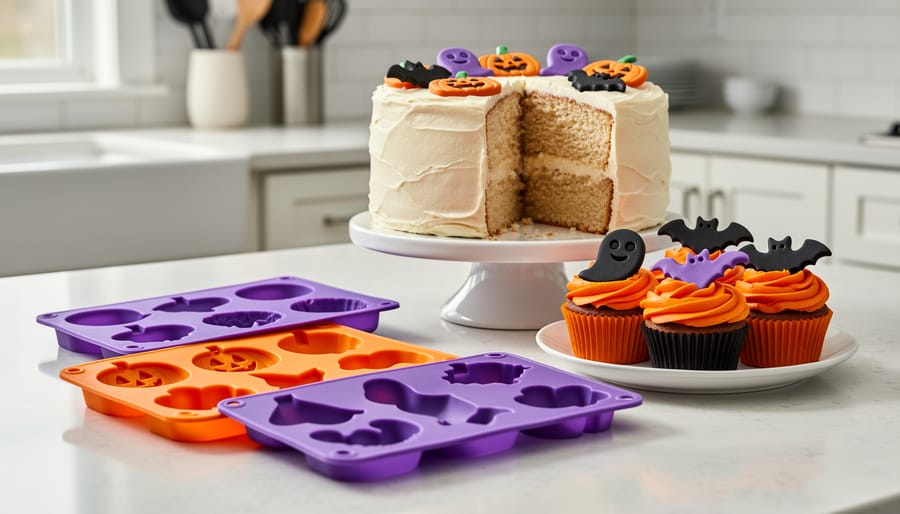
If you’re new to this, start with big, simple shapes. Pumpkins and ghosts are forgiving because they have chunky outlines and not much fine detail to lose, so they pop out cleanly even when little hands are helping. Once you feel confident, try skull faces, bats, or spiders, where the thin legs and tiny features take a little more patience.
A good mold should also suit your cake. A single large skull looks great on a round cake, while a set of small ghosts and bats works nicely around cupcake tops or along the edge of a sheet cake.
You’ll find pumpkin, skull, bat, ghost, spider, and tombstone mold sets listed widely, often in mixed Halloween sets so you get a few shapes in one. Small mold sets have shown up at around CAD $7 in current listings, so you can try a couple of designs without a big spend. While you’re gathering Halloween supplies for the party, it’s an easy add to the list.
Safety Notes Before You Start Decorating
Before the fun begins, a few quick safety habits will keep everything cozy and worry-free. First, check that your mold and any decorative extras are food-safe before they touch a cake. Many silicone molds can be used with both edible and non-edible craft materials, so it’s worth confirming how yours is meant to be used. Give it a good wash before the first use, too.
If you’re working with warm melted chocolate or candy melts, keep an eye on little helpers. Let them handle the pressing, sprinkling, and placing once things have cooled a bit, and save the hot pouring for a grown-up. It’s a lovely way to include everyone safely.
When friends or family are coming over, a quick allergy check goes a long way. Marzipan often contains nuts and chocolate usually has dairy, so a friendly “anyone have allergies?” text before the party saves stress later.
Finally, before serving young children, take off any small hard decorations or picks. Soft molded shapes are great for little ones, but tiny hard pieces are best removed first. A little care now means you can simply enjoy the spooky fun.
Step-by-Step: Molding and Placing Your Halloween Cake Decorations
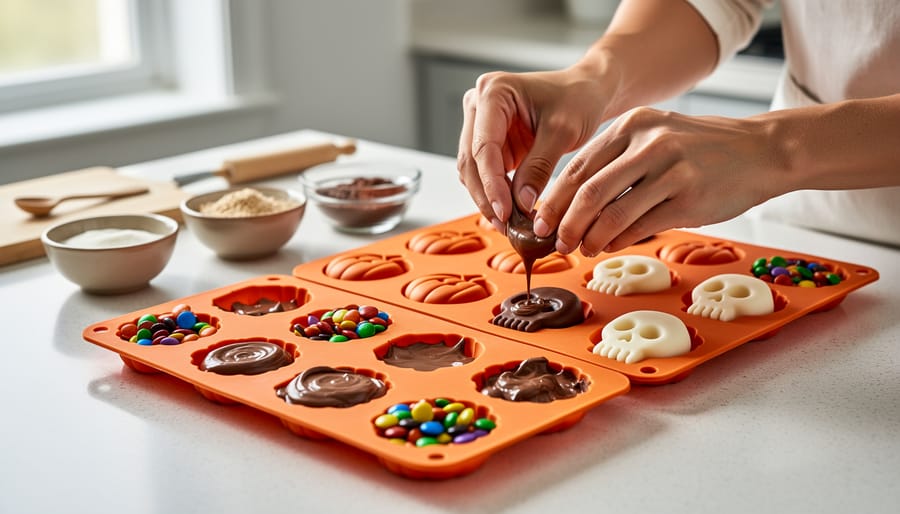
Matching the Right Material to Your Mold
Not every mold needs the same filling, so a quick match-up saves you from a frustrating bake-night surprise.
Sugarpaste and petal paste are your best bet when you want crisp, clean shapes to sit on top of a cake. They hold the little details, like a skull’s eyes or a pumpkin’s ridges, and they’re easy to lift out once set.
Marzipan is the softer, sweeter option. It presses in nicely and tastes lovely, though it’s a bit more forgiving than firm, so it suits chunkier shapes like pumpkins and ghosts. Just keep nut allergies in mind if guests are coming.
Chocolate or candy melts are perfect when you want a quick pop of fun. Pour or spoon them in, let them set, and you’ve got spooky bats and spiders in no time. This is also a great choice when little hands want to help.
Gummy-style mixtures add a playful, chewy touch. They’re a fun surprise on cupcakes and a hit with kids.
Here’s the simple rule I follow: firmer materials for detailed cake toppers, easy-melt treats for speedy decorating. If you’re ever unsure, start with a bigger, simpler shape and a material you already know how to handle.
Easy Ways to Arrange Decorations on Cakes and Cupcakes
Once your decorations are popped out and set, the fun part is arranging them. You don’t need a fancy plan, just a simple theme you can copy.
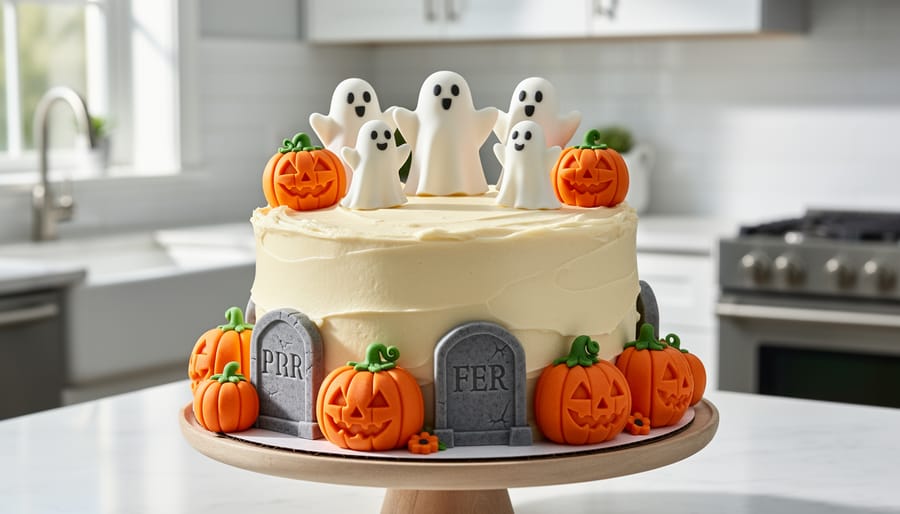
For a spooky graveyard, scatter tombstones across the top of the cake and tuck a few bats around the edges. A pumpkin patch border works beautifully too: line up pumpkins around the rim of the cake so it looks like a little harvest wreath. If you made ghosts, try a ghost parade marching all the way around the cake edge, each one a tiny bit different. For cupcakes, keep it easy with one standout skull on each, and you’re done.
Here’s something I love about this step: it’s where everyone can join in. Little ones can press pieces gently into place wherever they like, which usually gives you the most charming (and wonderfully wonky) results. Older kids can plan the layout or space things out evenly, and teens might enjoy adding the finishing touches. There’s a job for every age and comfort level, so nobody feels left out. If you’re looking for more ways to enjoy Halloween with kids cake decorating is a sweet place to start.
Don’t worry about perfection. A crooked bat just means it’s flying.
Checking Your Results and Fixing Common Hiccups
Your decorations are ready when they hold their shape as you lift them, the edges look clean, and the surface feels set rather than tacky. If you can pick up a pumpkin or ghost without it bending or smudging, it’s good to go.
If a piece sticks, don’t tug harder. Pop the mold into the fridge for a few minutes so the material firms up, then gently flex the silicone away from the shape. Since silicone is flexible and non-sticky, most pieces slide out once they’ve had a little more time to set.
If one tears or loses its detail, you have options. Re-press the material into the mold and try again, or tuck the wobbly piece into the back of the design as a background filler. A slightly squished bat still looks like it belongs in a spooky graveyard scene.
Once the party’s over, store any extra decorations in a covered container in a cool spot, and wash your molds so they’re ready for the next holiday. The same silicone shapes can be reused for other celebrations, which makes them a nice little investment for your kitchen.
Honestly, my kids have never once cared that a ghost had a crooked smile. Those quirks are part of the fun, mama, so let them be.
Halloween Cake Decoration Questions Moms Often Ask
Can I use chocolate molds for fondant?
Yes, these silicone molds are made for a wide range of edible materials, including sugarpaste, petal paste, and marzipan, so fondant works nicely. Many Halloween sets are even sold for chocolate, candy, and fondant at the same time.
What can I make with silicone Halloween molds?
Think pumpkins, skulls, bats, ghosts, tombstones, and spiders, all ready to sit on top of a cake or cupcakes. You can fill them with chocolate, candy, or gummy-style mixtures for a playful touch.
Are silicone molds reusable?
They are, and that’s part of the charm. They’re flexible, non-sticky, and easy to demould, so the same mold can come back out for other holidays too.
Can kids help?
Absolutely. Little hands love pressing sugarpaste into a pumpkin and popping out the shape, and it’s a lovely way to make memories. Just keep warm melted chocolate or candy melts for the grown-ups.
If you’re short on time, a ghost parade around the cake edge or one big pumpkin in the middle is plenty. A simple, slightly wobbly cake still gets the biggest smiles at the party. Looking for more easy ideas to round out your spooky spread? We’ve got you covered, and you can always start small with a single mold and a free afternoon.
You did it, mama. A few simple molds, a little sugarpaste or melted chocolate, and suddenly your cake has pumpkins, ghosts, and bats lining up like a tiny spooky parade. If one ghost has a wobbly smile or a bat lost a wing, that’s okay. Those quirks are what make homemade decorations so lovable, and the kids will remember the fun far more than the flaws.
We’d love to see what you create! Share your spooky cake photos and your best tips with the Mommy’s Nest community. Your idea might be exactly what another busy mom needs this Halloween.