 0
0
 0
0
You can create professional-looking Halloween decorations with your children in about 30 minutes using materials you already have at home, turning craft time into valuable learning opportunities that build fine motor skills, creativity, and confidence. As a mom who’s spent countless October afternoons covered in glue and glitter with my kids, I’ve learned that the best Halloween decorations aren’t the expensive store-bought ones. They’re the slightly lopsided paper bats and hand-painted pumpkins that spark real pride in our children’s eyes.
Making Halloween decorations at home gives busy parents a perfect way to celebrate the season while sneaking in developmental benefits. When your preschooler practices cutting paper ghost shapes or your elementary schooler follows multi-step instructions to build a cardboard haunted house, they’re developing crucial skills without realizing they’re learning. The process matters more than perfection, something I remind myself when my daughter insists her spider needs seven legs instead of eight.
This guide walks you through tested projects that work in classrooms, homeschool settings, and kitchen tables everywhere. You’ll find complete materials lists, clear step-by-step instructions, and child care tips to keep everyone safe while having fun. Whether you’re planning activities for one child or coordinating a classroom full of eager decorators, these projects deliver both festive results and meaningful time together.
What You’ll Need: Materials and Tools
You probably have most of what you need tucked away in kitchen drawers, recycling bins, and craft boxes right now. Unlike expensive store-bought Halloween door decor costs these homemade projects work beautifully with everyday materials that won’t stretch your budget.
Here’s what to gather before you start crafting with your kids:
Paper Crafts Foundation
- Paper plates (white or orange, 10-20 depending on class size)
- Construction paper in Halloween colors (black, orange, white, purple, green)
- Cardstock or card stock scraps for sturdier projects
- Newspaper or butcher paper to protect work surfaces
- White printer paper for smaller elements and templates
Painting and Coloring Supplies
- Washable tempera paint (orange, black, white, and green cover most projects)
- Paint brushes in various sizes, including foam brushes
- Markers, crayons, or colored pencils for details
- Paper plates or a paint palette for mixing colors
- Wet wipes and paper towels for quick cleanups
Recycled Materials
- Empty toilet paper or paper towel rolls (collect these a few weeks ahead)
- Clean mason jars or baby food jars with lids removed
- Cardboard boxes for larger projects or backing
- Egg cartons for paint palettes or small creature parts
Natural and Embellishment Items
- Collected leaves in autumn colors
- Small pumpkins or gourds from the grocery store
- Googly eyes in assorted sizes
- Yarn, string, or ribbon for hanging
- Gauze, white fabric scraps, or toilet paper for mummies
- Battery-operated LED tea lights (never real candles with kids)
Most moms find these materials cost under twenty dollars total when starting from scratch, and many items work for multiple projects throughout the year.
Safety First: Age-Appropriate Considerations
Before you dive into creating decorations, a few safety basics will help everyone have fun without worry. Young children thrive with hands-on projects, but each age group needs different levels of supervision and materials.
For toddlers and preschoolers (ages 2-5), stick with washable, non-toxic paints and large materials that can’t become choking hazards. Choosing safe art supplies means checking labels for AP (Approved Product) or CL (Certified Label) seals, which indicate they’ve been reviewed for safety. Skip anything with small buttons, googly eyes smaller than a ping-pong ball, or beads if younger siblings are around. One mom at our child care updates discussion mentioned using jumbo pom-poms and chunky foam shapes instead, which worked beautifully.
Elementary-age kids (6-10) can handle child-safe scissors and supervised glue gun use, though you’ll want to operate the hot glue yourself until they’re closer to ten. Always check craft materials for common allergens, especially if you’re using natural items like acorns or leaves that might have been treated with pesticides.
When it comes to candles, Use flameless candles instead of real flames in classrooms and homes with children. Battery-operated LED tea lights create the same cozy glow without any fire risk, and kids can turn them on and off themselves.
Step-by-Step Halloween Decoration Projects
Paper Plate Jack-o’-Lanterns
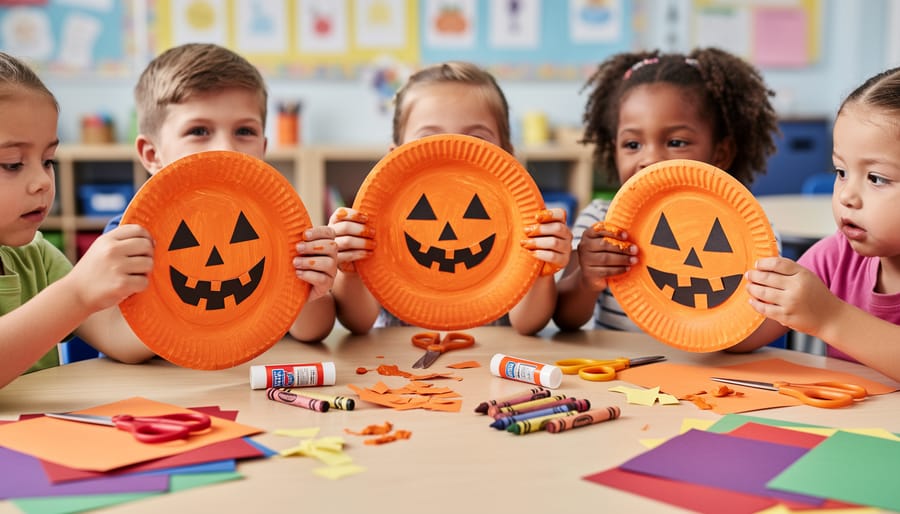
Paper plate jack-o’-lanterns are one of those perfect projects where simple materials turn into big smiles. I’ve watched classrooms full of kids transform plain white plates into glowing pumpkin personalities, and the pride on their faces never gets old.
Start by gathering white or orange paper plates (one per child), orange paint if using white plates, green construction paper for stems, black markers or construction paper for faces, and glue sticks. Cover your workspace with newspaper or plastic tablecloths because paint will travel.
- Have children paint white plates orange, using brush strokes that go in the same direction. This teaches them control and creates an even finish. Let plates dry completely, about 20-30 minutes.
- While plates dry, cut stem shapes from green construction paper. Kids who can safely use scissors love this part; younger ones can tear paper for a rustic look.
- Draw or cut out triangle eyes, a triangle nose, and a jagged smile from black paper. Pre-cut shapes work well for toddlers; older kids can draw directly with markers.
- Glue facial features onto the dried plate, letting children arrange them however they like. Crooked faces have the most character.
- Attach the green stem at the top with glue or a stapler.
The beauty here is watching three-year-olds practice their pincer grip while placing triangles, while kindergarteners experiment with different expressions. Some plates become silly, others spooky. Punch a hole at the top and string them across your classroom for an instant Halloween gallery, or send them home as festive take-home art that parents actually want to display.
Handprint Ghosts and Monster Banners
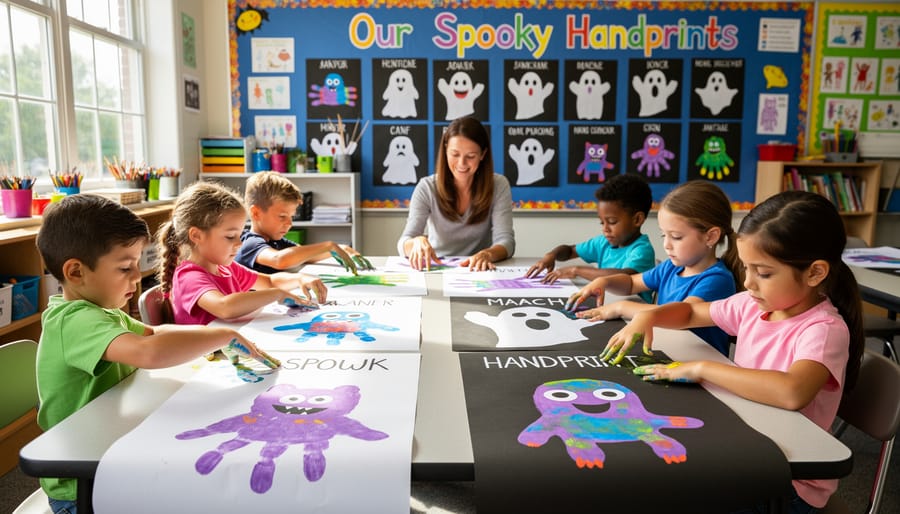
Handprint ghosts capture precious moments while creating adorable Halloween decorations your kids will love making. Start by having each child press their palm into white washable paint, then stamp it firmly onto black or orange construction paper. The palm becomes the ghost’s body, and the fingers create a flowing, wispy effect. Once dry, kids can add googly eyes or draw simple faces with markers. Older children can write their names and the date on the back, transforming these into keepsakes you’ll treasure for years.
For monster banners, use various paint colors and have children make handprints on white cardstock or heavy paper. Space prints about an inch apart to create a garland effect. After drying, let kids add monster features: multiple eyes, pointy teeth cut from white paper, or silly antennae made from pipe cleaners. Punch holes in the top corners of each print and thread yarn or ribbon through to connect them. These banners look fantastic stretched across classroom bulletin boards or doorways. You can extend the literacy connection by having kids label each monster with a name or describing word like “silly” or “friendly.” If your class enjoys this project, explore more ghost crafts that work beautifully for group activities.
Toilet Paper Roll Mummies and Bats
Toilet paper rolls transform into adorable Halloween characters that kids love making and displaying. Start with the mummies by having children wrap empty rolls with white gauze strips or torn white tissue paper. Use school glue to secure the wrapping, leaving a small gap near the top for the face. Stick two googly eyes in that space, and your mummy is complete. These stand upright naturally, making them perfect for windowsill displays.
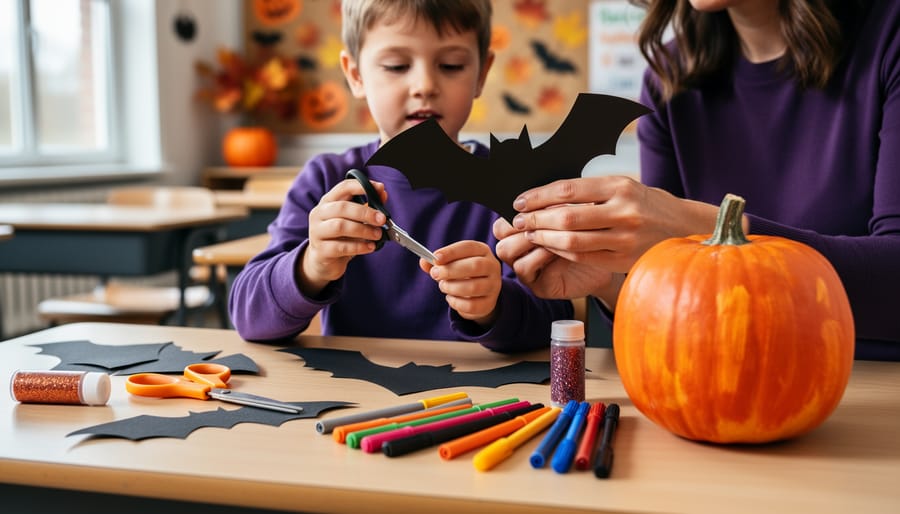
For bats, paint the toilet paper roll black (or wrap it in black construction paper to skip drying time). Once dry, cut bat wing shapes from black paper and glue them to the sides. Add white circle eyes and draw on a tiny mouth. Create pointed ears by pinching the top of the roll before gluing on small black triangles.
These projects work beautifully for mixed-age classrooms. Younger children can focus on wrapping and gluing while older kids cut out wing shapes independently. Line them up across a classroom shelf or hang bats from the ceiling using fishing line. One mom’s tip: make extras because kids often want to take theirs home and create a classroom display.
Mason Jar Lanterns
Mason jar lanterns bring that warm Halloween glow to your classroom without any fire risk. Start by cleaning and drying several jars, baby food jars work perfectly for small hands, while pint-sized mason jars create more dramatic displays. Have kids tear tissue paper in orange, purple, black, and green into small pieces (this tearing motion builds hand strength!). Mix equal parts white glue and water in a small bowl to create your adhesive.
Children can brush the glue mixture onto the outside of their jar, then press tissue paper pieces all over, overlapping them to create rich color combinations. They’ll love watching colors blend where pieces overlap. For older kids, try painting jars with glass paint or acrylic mixed with a bit of glue for better adhesion, simple faces, spooky silhouettes, or abstract patterns all work beautifully.
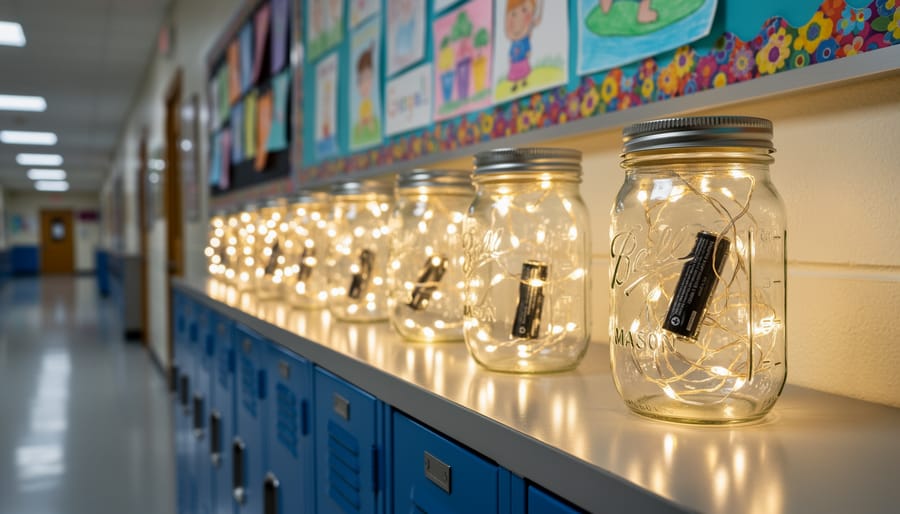
Let jars dry completely overnight. Flameless LED is safer than real candles around children and paper decorations, so drop battery-operated tea lights inside each jar. These little lights last for hours and won’t tip over if bumped during recess excitement.
Turn off your classroom lights and watch kids’ faces light up when their lanterns glow. This is a perfect moment to talk about how light passes through translucent materials differently than transparent ones, real science happening right in your Halloween decorations!
Nature-Based Decorations: Leaf Garlands and Painted Pumpkins
Nature walks provide the perfect opportunity to collect decorating materials while teaching kids about fall’s natural changes. I love taking my classroom outside during those crisp October mornings when leaves are showing their best colors and small pumpkins appear at local farm stands.
Start by giving each child a collection bag and setting clear boundaries for your outdoor exploration. Look for leaves in various shapes, sizes, and colors, the vibrant reds, oranges, and yellows make stunning decorations. Remind children to only collect leaves that have already fallen and to watch for any with holes or damage that might not preserve well. You can also pick up interesting twigs, acorns, and seed pods to incorporate into your projects.
Once you’re back inside with your natural treasures, here’s how to turn them into lasting Halloween decorations:
- Press fresh leaves between newspaper or paper towels, weighted down with heavy books, for at least 48 hours to flatten and begin drying them.
- For faster preservation, brush both sides of leaves with a thin coat of Mod Podge or diluted white glue, then let them dry completely on wax paper.
- Thread a long piece of twine or yarn through a large plastic needle, then carefully poke through the stem end of each preserved leaf to create a garland.
- Space leaves about two inches apart along your garland, alternating colors and sizes for visual interest.
- Prepare small pumpkins or gourds by wiping them clean with a damp cloth and letting them dry thoroughly.
- Set up a painting station with washable acrylic paints in Halloween colors, orange, black, white, green, and purple work beautifully.
- Let children paint faces, patterns, or designs on their pumpkins, encouraging creativity rather than perfection.
- Allow painted pumpkins to dry for several hours before displaying them on tables, windowsills, or shelf areas.
These nature-based projects open wonderful conversations about why leaves change color, how pumpkins grow, and what happens to plants as seasons shift. Children connect their science lessons to tangible, beautiful creations they can display with pride. The leaf garlands look gorgeous draped across bulletin boards or windows, while the painted pumpkins add cheerful spots of color throughout your space without the mess or safety concerns of carving.
Making It Educational: Learning Opportunities in Every Project
Every decoration project becomes a rich learning experience when you approach it with intentional conversation and curiosity. While your kids are gluing googly eyes on paper plate pumpkins, they’re counting features (“How many eyes does our jack-o’-lantern need?”), identifying shapes (triangles for noses, circles for eyes), and practicing one-to-one correspondence. When painting handprint ghosts, talk about color mixing, what happens when we add white to black? Can we make different shades of orange? These natural moments turn craft time into science lab without feeling like a formal lesson.
Literacy opportunities are everywhere in these projects. Introduce Halloween-specific vocabulary as you work, “spooky,” “cobweb,” “silhouette,” “crescent moon”, and older children can label their decorations or write short Halloween stories inspired by the characters they’ve created. Their handprint ghost could become the star of a story about a friendly ghost who helps lost trick-or-treaters. Incorporating classroom-friendly ideas like these extends the value beyond a single craft session.
The social-emotional learning during group decoration projects is just as valuable. Kids practice patience while waiting for paint to dry, learn to share limited supplies, and develop resilience when their bat wings don’t turn out exactly as imagined. Celebrate their unique interpretations, no two pumpkins should look identical. Ask questions that encourage reflection: “What was your favorite part of making this?” or “What would you do differently next time?” The pride children feel displaying their work builds confidence that extends far beyond Halloween.
How to Know Your Decorations Are Classroom-Ready
Before hanging your creations, run through this quick safety and durability check to make sure they’ll hold up in a busy classroom environment.
Give paint and glue at least 24 hours to dry completely. Press your finger gently on the back of a decoration, if anything feels tacky or transfers to your skin, it needs more time. Wet crafts attract dust and can smudge when little hands touch them.
Test durability by giving each piece a gentle shake. Paper plate pumpkins should have features firmly attached, and mummy wrappings need to stay in place. If something falls apart during your test, it definitely won’t survive a week on the classroom wall.
Check for allergens if you used food items like candy corn or if any child has latex sensitivity (some gloves used during painting contain it). When in doubt, label the decoration with materials used.
Consider where you’ll display each piece. Lightweight items work great on bulletin boards, but heavier mason jar lanterns need a stable shelf. Keep dangling decorations away from doorways where they might get knocked down during transition times.
Store finished decorations flat in labeled boxes with tissue paper between layers. You’ll thank yourself next October when everything’s ready to go again.
What to Do Next: Display Ideas and Extension Activities
Now that you’ve created these wonderful decorations with your kids, it’s time to show them off! In the classroom, group similar projects together to create themed display areas, hang all the handprint ghosts in one corner, arrange the pumpkins on a table, and string the banners across the windows. This helps children appreciate the collective effort and see how individual work contributes to something bigger.
Consider hosting a “decoration museum walk” where kids tour the room with parents or other classes, explaining their creations. This builds presentation skills and confidence while validating their hard work.
For projects going home, attach a small note explaining what your child made and the skills they practiced. Parents love this connection to learning. Before you take down Halloween decorations, snap photos for portfolios or classroom scrapbooks, these become treasured memories.
As Halloween winds down, transition seamlessly into Thanksgiving by adapting your decoration techniques. Those painted pumpkins? Perfect for a gratitude display where kids write what they’re thankful for. The leaf garlands easily become autumn centerpieces. You’re not starting from scratch, you’re building on skills and confidence your students already developed, making the next project even more enjoyable together.
Your Questions Answered
How do I manage the mess when crafting with multiple children?
Set up a designated craft zone with newspaper or a vinyl tablecloth underneath, keep wet wipes within arm’s reach, and have kids wear old t-shirts as smocks. Assign each child their own small workspace and clean as you go between project stages rather than waiting until the end.
What if I have children of very different ages working together?
Choose base projects that work for everyone but adjust the complexity, younger kids can paint pumpkins while older ones add intricate details or help write labels. Pair older children as “craft buddies” with younger ones, which builds leadership skills and keeps everyone engaged at their level.
Can I still do these projects if I’m short on supplies?
Absolutely. Most projects adapt easily to what you have, use magazine pages instead of construction paper, coffee filters instead of tissue paper, or branches and leaves from outside instead of store-bought materials. The creativity often shines brightest when working with limitations.
What do I do when a child gets frustrated with their decoration?
Remind them that every decoration is unique and special, just like they are. Sometimes stepping away for a few minutes helps, or you can gently guide them to see their work through fresh eyes by asking what they like best about it so far.
How can I speed up these projects when time is tight?
Pre-cut shapes and materials before the children arrive, use faster-drying tempera paint instead of acrylics, and focus on one or two simpler projects rather than attempting everything at once. Remember that even a quick 15-minute craft session creates meaningful memories.
One mom from our community shared that her biggest breakthrough came when she stopped aiming for Pinterest-perfect results. Her preschoolers’ lopsided ghosts and enthusiastically over-glued mummies became the decorations everyone loved most because they captured genuine kid creativity. Another teacher mentioned keeping a “leftover bin” throughout the year specifically for Halloween projects, which eliminated last-minute supply runs and gave kids interesting mixed materials to explore.
The frustration question comes up constantly, and it’s so real. I’ve found that having a few extra paper plates or toilet paper rolls set aside as backups takes the pressure off. When a child feels their first attempt didn’t work out, they can start fresh without feeling like they’ve failed. Sometimes the “mistakes” turn into the most creative pieces, that ghost that got too much glue became a “mummy ghost,” and suddenly every child wanted to make one.
Creating homemade Halloween decorations with your little ones isn’t about achieving Pinterest-perfect results. It’s about those paint-covered fingers, proud smiles, and “Look what I made!” moments that make teaching so rewarding. Every wobbly ghost and lopsided jack-o’-lantern represents learning, creativity, and memories you’re building together.
The decorations hanging in your classroom tell a story of collaboration, problem-solving, and childhood joy. Some might be crooked, others might have extra glue showing, and that’s exactly what makes them special. Your students poured their hearts into these creations, and that effort deserves celebration.
We’d love to hear how your Halloween crafting adventures went! Share your photos, funny moments, and clever adaptations with our Mommy’s Nest community. Your experiences might be exactly what another mom needs to hear today.